Adding Custom Action Buttons
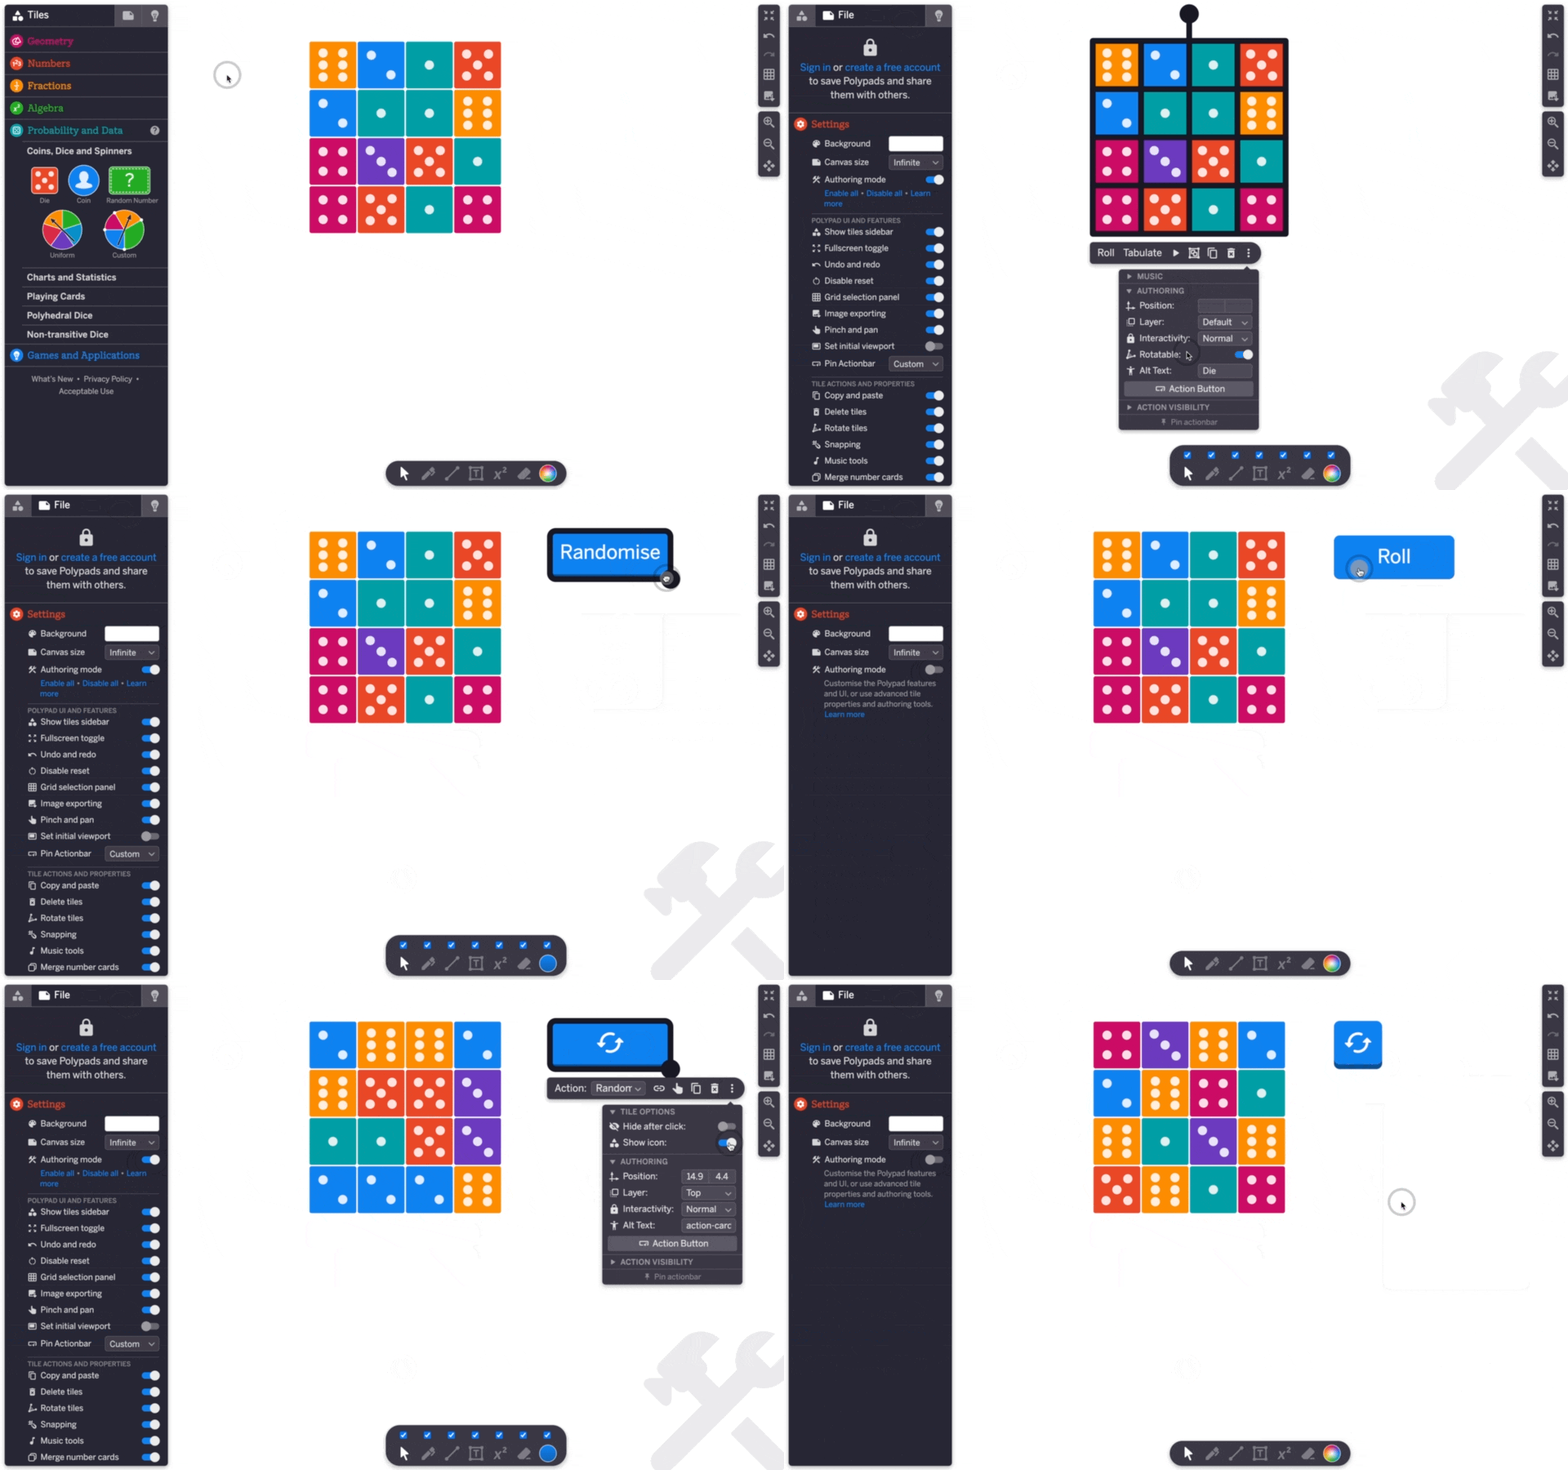
To add a custom action button, first select the tile or tiles you’d like controlled by the button. Then, to add a button to the canvas, open the More Tools (⋮) menu, expand the Authoring section, and click Action Button. Next, use the dropdown menu on the new button to select the action you’d like the button to perform. The following actions will appear in buttons for all tiles.

Action Types
- Show: Outside of authoring mode, clicking Show changes a tile(s) setting from invisible to normal. For this button to work, be sure the change the interactivity on the tile(s) from Normal in Invisible. Once Show is clicked and the invisible tile is revealed, the button no longer causes any action (unless another button is used to make the tile invisible again).
- Hide: Outside of authoring mode, clicking Hide makes the tile invisible. Once Hide is clicked and the tile is invisible, the button no longer causes any action (unless another button is used to make the tile appear).
- Toggle: Use the toggle button to go back and forth between a tile(s) being invisible or appearing. When first adding the toggle button, the tile(s) will continue to appear on the canvas. To set the initial state so the tile(s) starts as hidden, change the interactivity to invisible.
- Flash: When selecting Flash, the tiles(s) will automatically become invisible. Outside of authoring mode, clicking Flash will cause the tile to appear on the canvas for a given number of seconds (the default is 1) and then the tile be become hidden again. To change how long the tile will flash for, click on the button inside authoring mode and use the Duration input field in the action bar of the button.
- Navigate: This button will zoom in on the the selected tiles or tiles. In the more Tools (⋮) menu, turn on the Alternate Zoom toggle to have the button function as a zoom-in and zoom-out button. When the toggle is off, the button will just zoom in on the selected tiles. Clicking it again won’t do anything unless the zoom level has been changed via another button or using the zoom controls in the settings menu.
Some tiles have additional action button options:
- Play: This action is available for any tile that can play music (polygons, number bars, fraction bars, graphs, and the track tile).
- Randomize: This action is available for any time that can be randomized (dice, coins, spinners, and random number cards).
Button Options
Other Options in the More Tools (⋮) menu:
- Hide After Click: Turning on this toggle will cause the button to become invisible after use.
- Show Icon: Turning on this toggle will replace the words on the button with an icon. The icons cannot be customized.
Edit action buttons within authoring mode. Double-click on the text to edit the label on the button. Use the circular handle to change the size of the button. Use the color picker to change the color of the button. Outside of authoring mode, the button cannot be edited.
Drop Zones and Buttons in the Track Tile
- If you link a button to a drop zone, its action is performed on all tiles the drop zone when clicked.
- Actions buttons can be used in the track tike to allow multiple actions to happen on a single click. To see an example, open this Polypad and click the "Next" button. Then, enter Authoring mode in the File tab and zoom out to see the hidden track tiles with multiple buttons inside of them.
Some Examples
Other Authoring Tutorial Pages
Edit advanced properties for tiles
Set global settings for the entire Polypad
Select which tiles appear in the sidebar and what tools appear in the bottom toolbar
Turn on and off options in the action bar of tiles
Add custom buttons to the canvas to control tile actions
Using the input field and drop zone tile
Using drag-and-drop and click-to-place to send tiles to drop zones