Overview and Objective
In this exploration, students will use the polygons on Polypad to create regular and semi-regular tessellations. They also create their own tessellating design. Students will also also create their tessellating design by transforming the regular polygons using Escher-like techniques.
This activity can be extended using reptiles, spidrons, sphinx, Penrose tilings, and kite-square activities to design a longer unit.
This explorations contains a variety of activities around tessellations. Each activity below could be a separate lesson plan. This exploration could be used a mini-unit on tessellations that is either used as one sequential unit or as multiple explorations that are spread out over a period of time and interspersed with other topics of study.
Warm-Up
Ask students to draw a bee-hive on blank Polypad canvas and talk about the properties of the bee-hive. Then, ask them to share about the design of kitchen or bathroom tiles at their home or school. Perhaps even the floor of your classroom at school is a good example. These examples can be used to emphasize the importance of having no gaps and overlaps in a tiling pattern.
Share some student work and add some examples if necessary. Then, you may identify these designs as tessellations and define a tessellation as a pattern of shapes covering an entire surface with no gaps and no overlaps.
Activity #1
If the students did not mention it already, you might remind them of the brick designs. Brick wall design is not an edge-to-edge tiling example since the long side of each brick is shared with two bordering bricks.
Discuss that rectangles can easily be arranged as edge-to-edge to create another tessellation. Therefore, by using a polygon or a couple of polygons, one can create different tessellations. Both tilings are made by only sliding the rectangles.
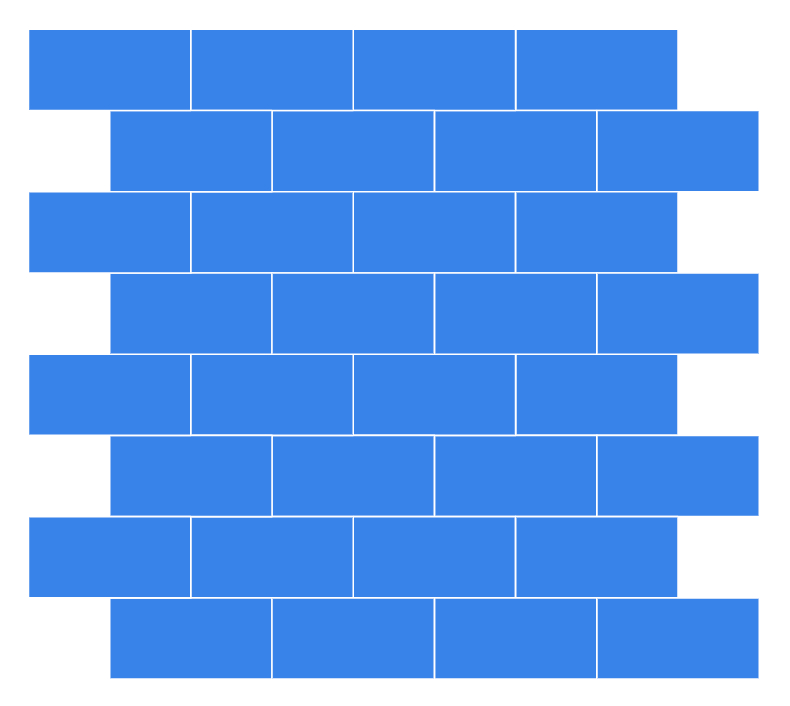

Discuss that one can combine different transformations when making a tessellation. Ask students what kind of movements they observe in the rectangular tessellations here. They might answer by using the words flips, turns, slides, and scaling. You may need to mention the respective mathematical terms for each.

Let students identify the translation types of each of the tessellations here. Discuss that even by using the same shape with different colors, they may come up with endless patterns under the various transformations.

At this point, you may want to jump to the kite squares activity before you move on to talk more about reflection, translation, and rotation. In the kite squares activity, students are asked to create different tessellations using different transformation types.
Activity #2
Ask students to think about what type of quadrilaterals and triangles can tessellate.
Let them use the existing polygon tools as well as the ones they created with the custom polygon tool to make tessellations.

Invite students to share their designs.
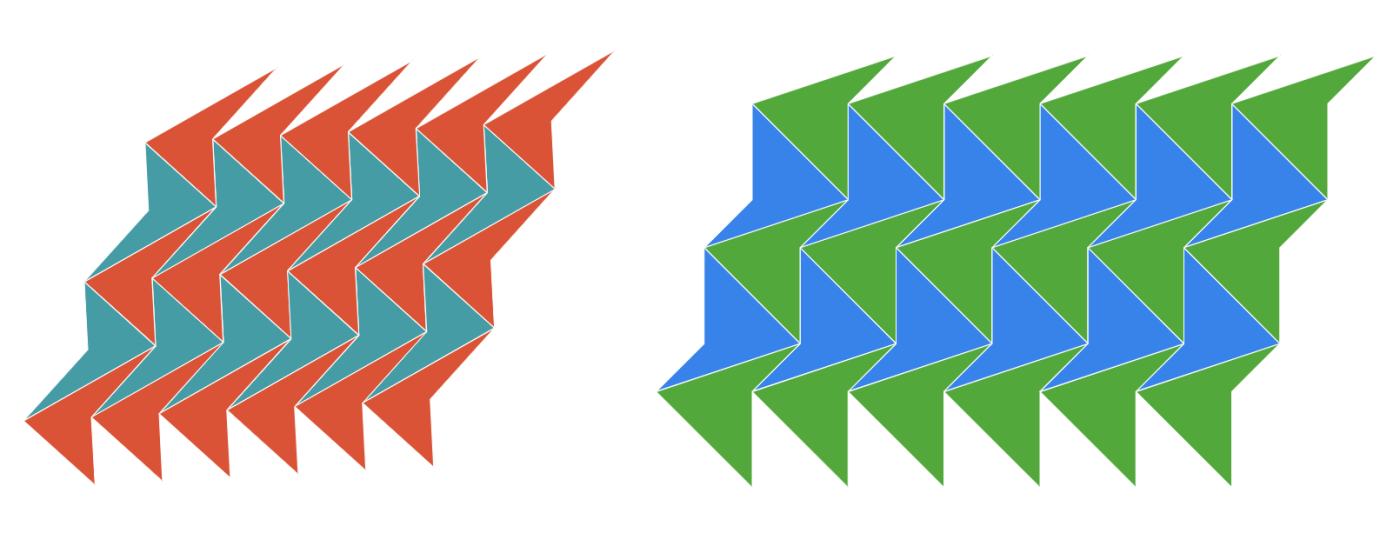
After students explored that all types of triangles tessellate, let them explain their reasoning. Clarify with the students that any two congruent triangles will make a parallelogram which will always tessellate.
Again, all quadrilaterals tessellate. Here you may ask about the concave ones. Let them use the free-polygon tool to create concave quadrilaterals to investigate the answer. Then, invite some students to share their designs.
Activity #3
The history of tessellations dates way back to ancient times. These designs were used by the Sumerians (about 4000 BCE) as clay tiles to decorate walls. The art of tiling a plane might have been around for the last 6000 years, but there are still many things to discover about it. Since almost every civilization used tessellations throughout history, there are practically endless different examples of tessellation. An overview of some of the well-known type of tessellations might be interesting to students.
There are different types of tessellations. The first ones are called Regular Tessellations. In a regular tessellation, all the shapes are the same regular polygon and all the vertices are the same. Invite them to create regular tessellations
Let students use regular polygons to create tessellations. Remind them that they can only use one kind of regular polygon for each of their designs.

They probably will come up with designs made up of equilateral triangles, squares, and regular hexagons quickly. Discuss the reasons why a pentagon, heptagon, octagon, or any other won't tessellate.
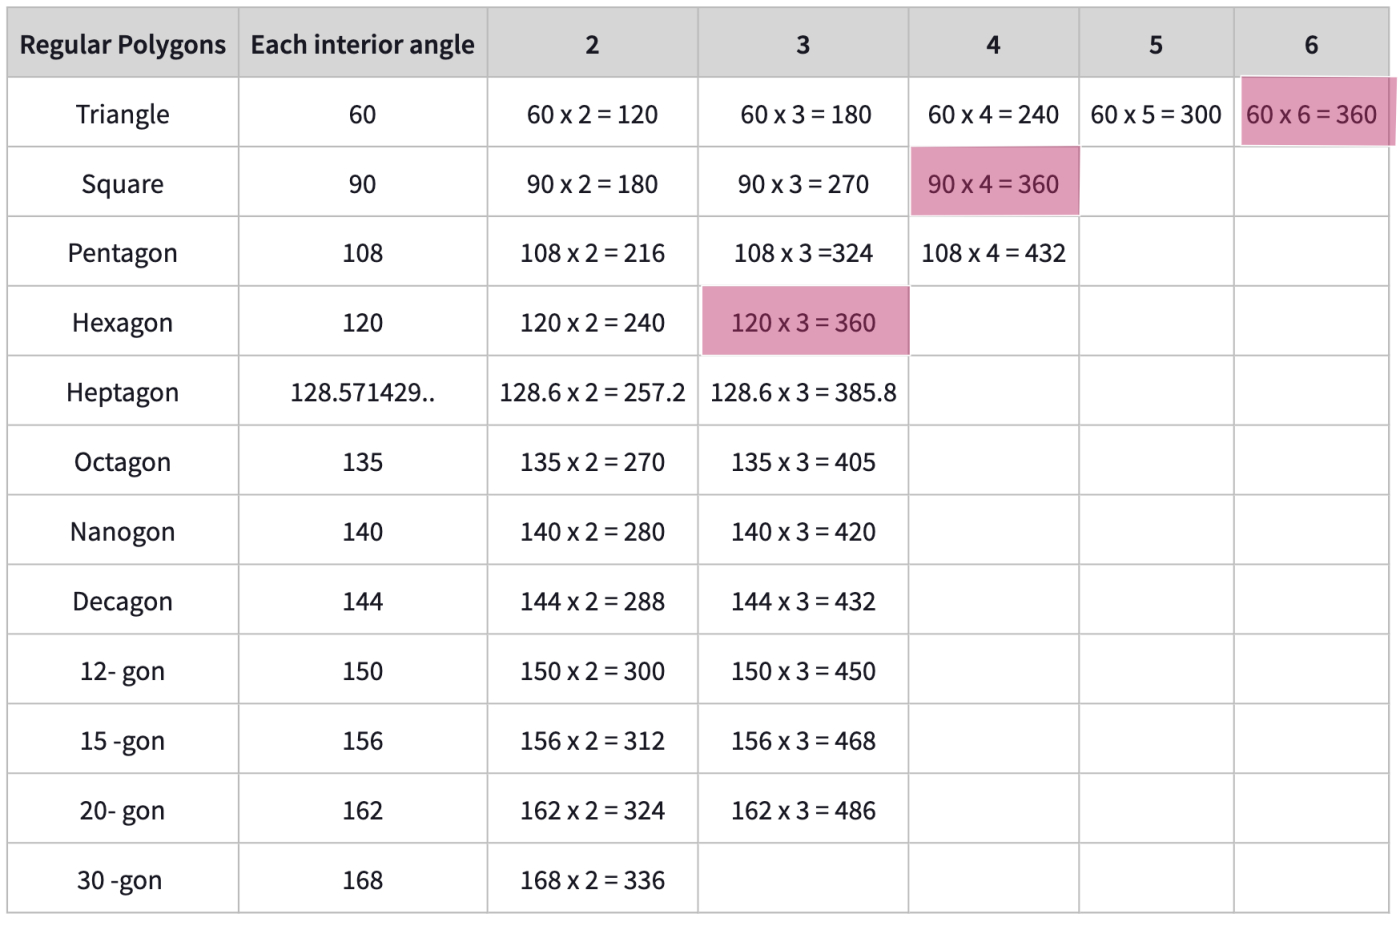
Polygons need to meet at a vertex in a way to create angle. You may want to avoid mentioning being a divisor of 360 so as not to cause any possible misconceptions for the other type of tessellations. As a class, you may create a table that shows the total measure of angles when different numbers of polygons come together at a vertex.
Here is a table to prove why there are only three regular polygons that create regular tessellations:
Invite students to choose a corner point on the triangle tessellation. Ask them to notice the shapes that meet at that corner as well as the number of shapes. Then, let another student choose another corner point to answer the same questions.
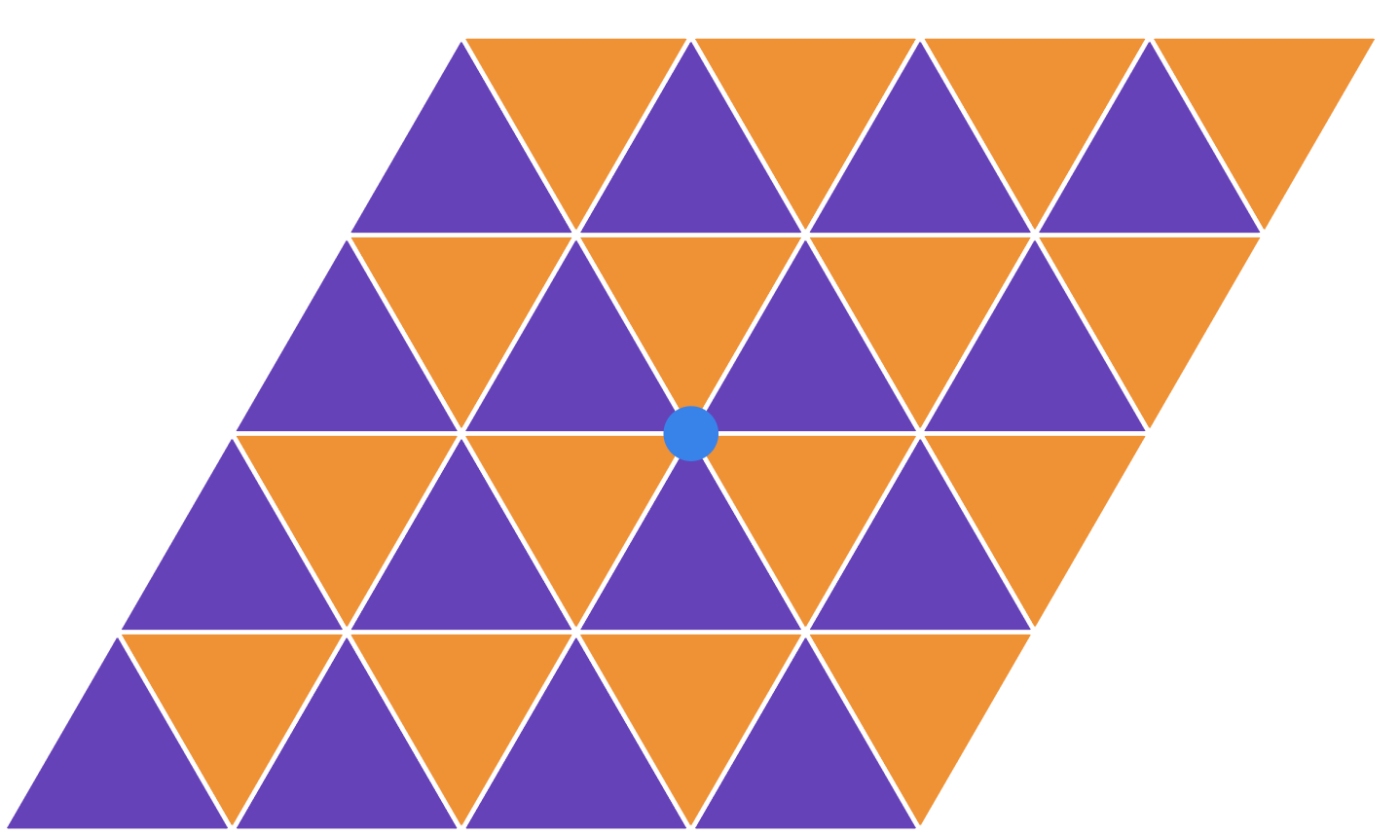
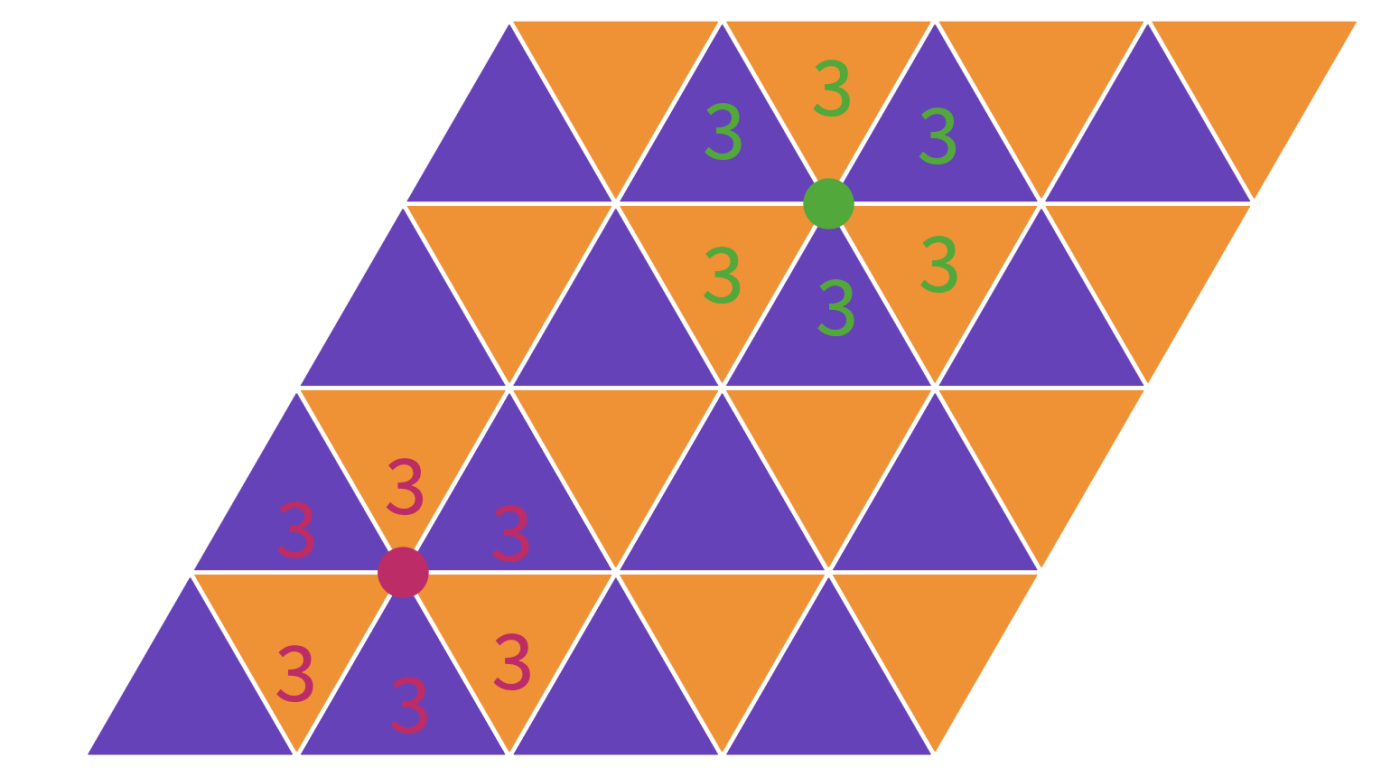
Each of these corner points where the polygons meet is called a vertex. In this tessellation, six equilateral triangles meet at each vertex. So the vertex configuration of this tessellation is . Ask students the vertex configurations of the other regular tessellations.
Clarify with the students that hexagons have whereas squares have configuration. Among all the different types of tessellations, we could only identify three of them as regular tessellations.
Activity #4
Now, ask students to try using at least two different regular polygons to create a tessellation. Remind them that they can use not only the triangle, square, and hexagon but all the regular polygons like octagons or dodecagons. You may also want to remind them that they are also free to use any number of polygons. The only restriction they have is that every vertex has to have the same arrangement of regular polygons around it.
If needed, you may share an example to clarify the requirements of this new type of tessellation before you let them work in groups or pairs to come up with examples.
Here is a semi-regular tessellation formed by a triangle, square and regular hexagon. You can pick any vertex to write the configuration of the tessellation.
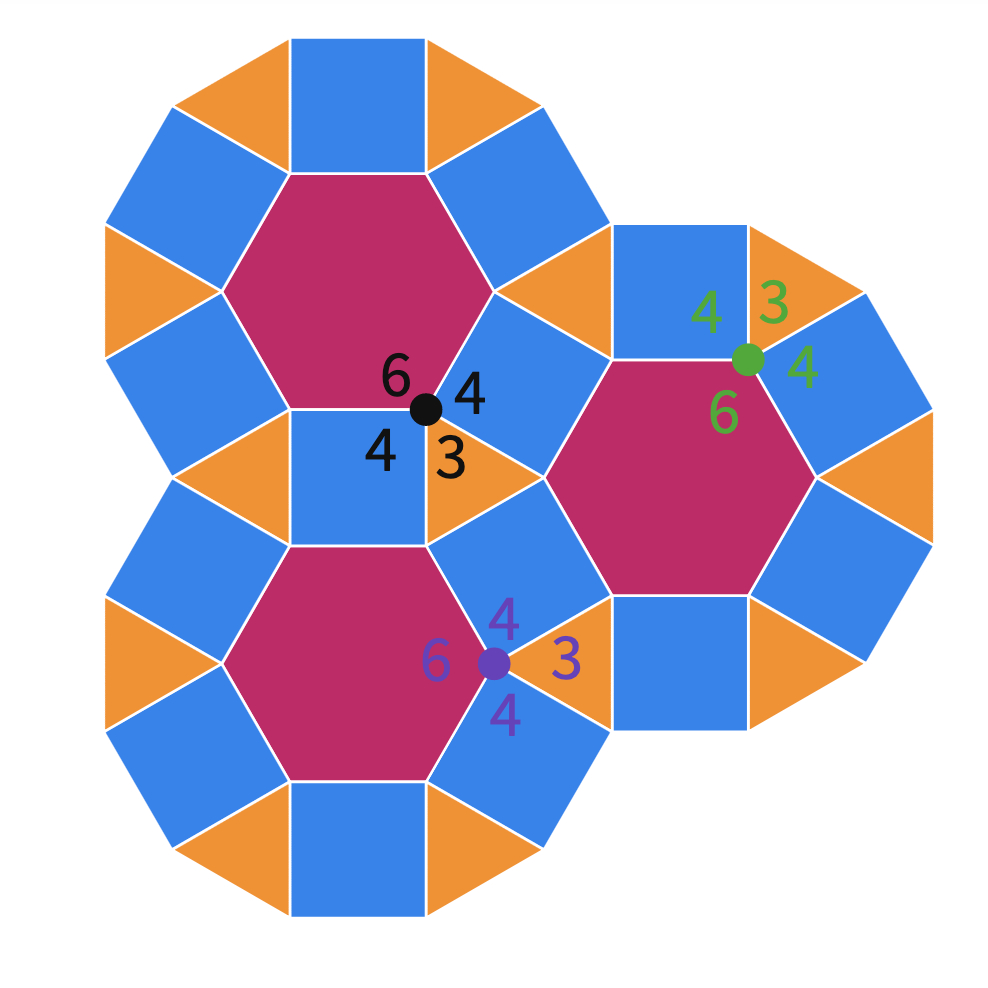
Clarify with the students that when naming the designs, first, they need to pick a vertex, then start with the polygon with the smallest number of sides and go around the vertex in order to write down how many sides each polygon has. For example, this design's configuration is .
After sharing some students' work, tell them this particular tessellation is called semi-regular tessellations. Here, all the shapes are still regular polygons, but one may use more than one type of regular polygon. There are actually only 8 of them. For students, finding all semi-regular tessellations can be tricky, so you may lead them with the following prompts to find the designs easier.
- You can use these codes in both ways. For instance, if you are given , you can understand that three triangles and three squares meet at a corner. Let students find this semi-regular tessellation.
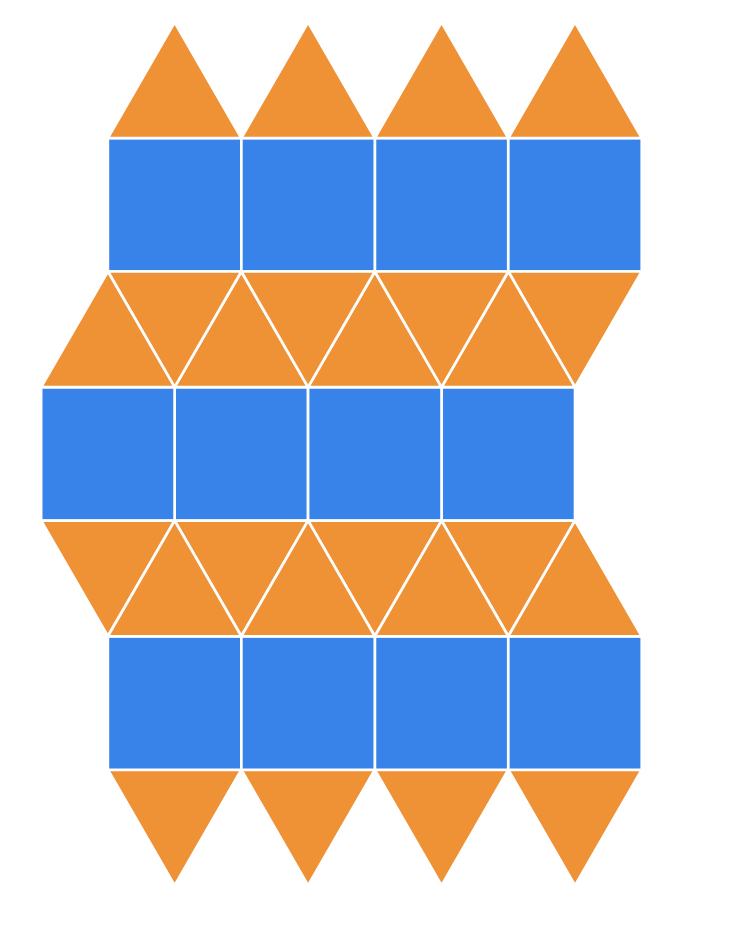
- After they find it, you may ask about .
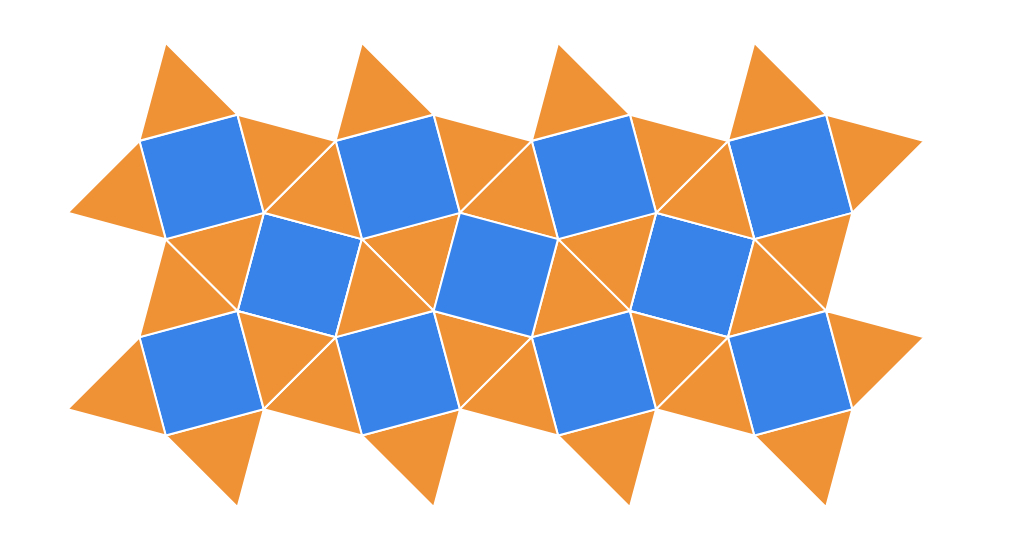
There is no other square and equilateral triangle only semi-regular tessellations.
- There are two different configurations for equilateral triangle and hexagon. Here, some students may express the problem algebraically as , and by trial and error, (since both x and y must be positive integers), they can reach the number of polygons.

- Which regular polygon can be used to make a semi-regular tiling with an octagon?
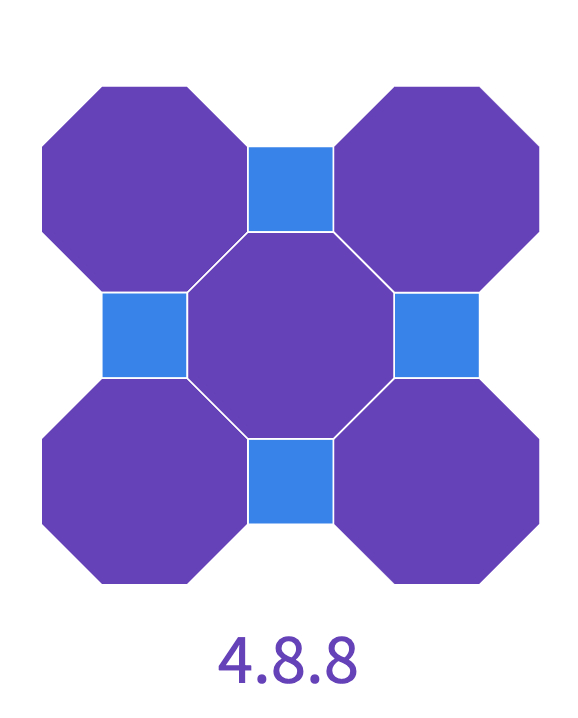
- Which regular polygon(s), can be used to make a semi-regular tiling with a dodecagon?
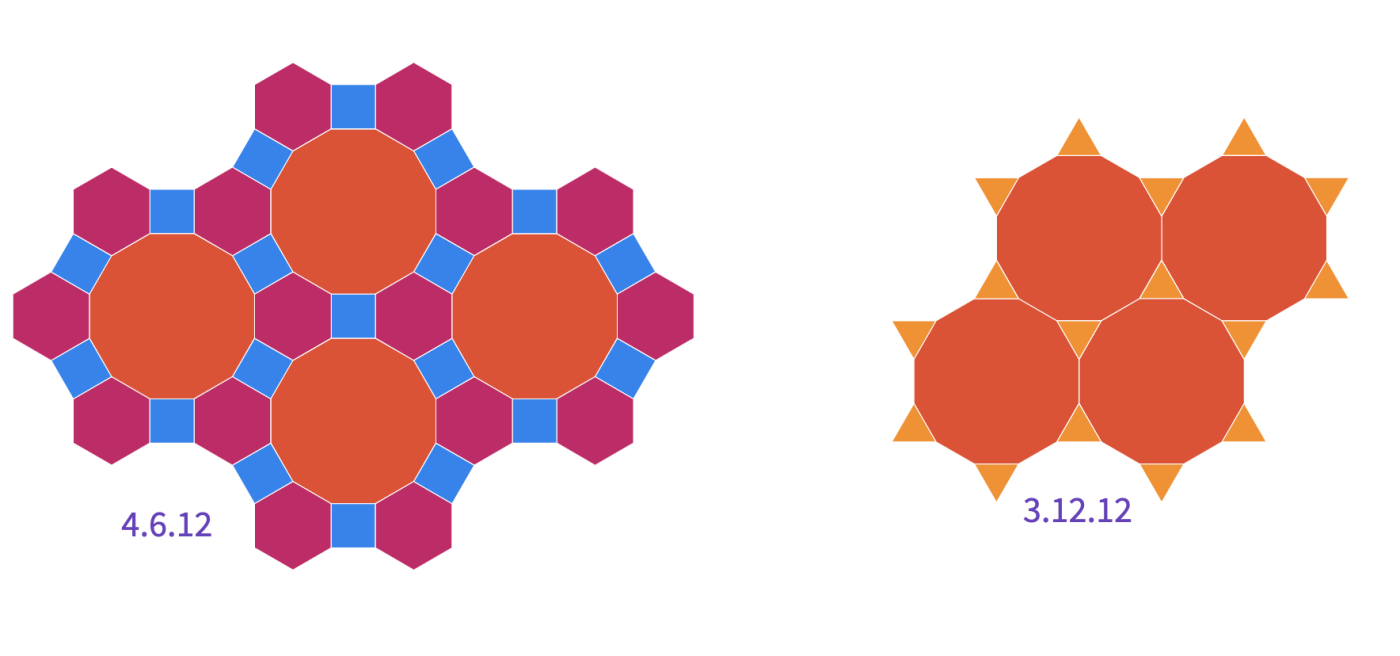
Students may be surprised that there are only 8 of them.
Activity #5
Now, remind students about the tessellations they have made using different types of triangles and quadrilaterals at the beginning of the lessons. These are called irregular tessellations.
Irregular tessellations can be made from other shapes such as pentagons, polyominoes, and in fact, almost any kind of geometric shape.
Let students use pentominoes and tetrominoes to make irregular tessellations.
Here are some possible designs.
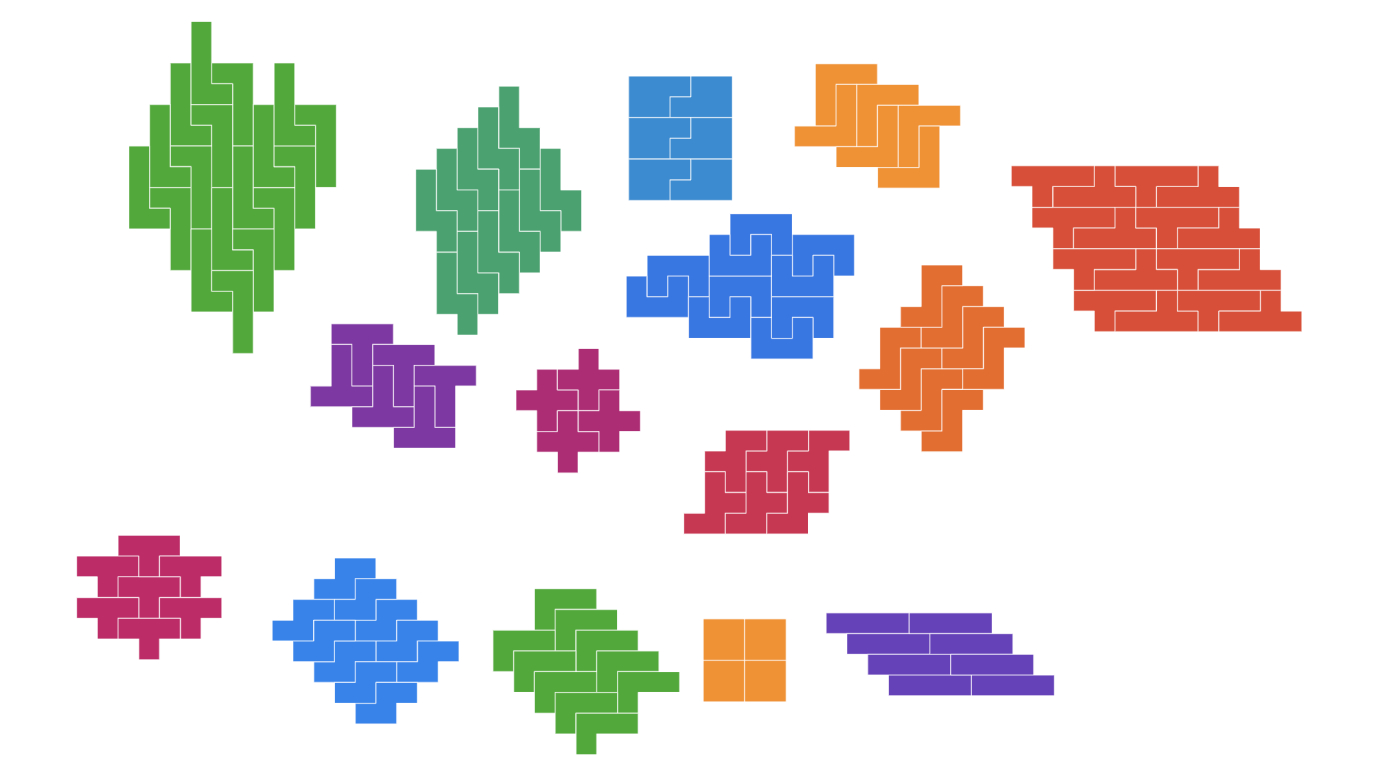
Clarify with students that all triominoes, tetrominoes, pentominoes, and hexominoes tessellate. From heptominoes onwards, they don’t all tessellate. For students who are interested in tessellations can work on this problem later.
Activity #6
Tessellation using irregular pentagons is more complex than students may think. For instance, 15 different kinds of irregular pentagons can tessellate. Students can find all of them under the pentagon tilings.
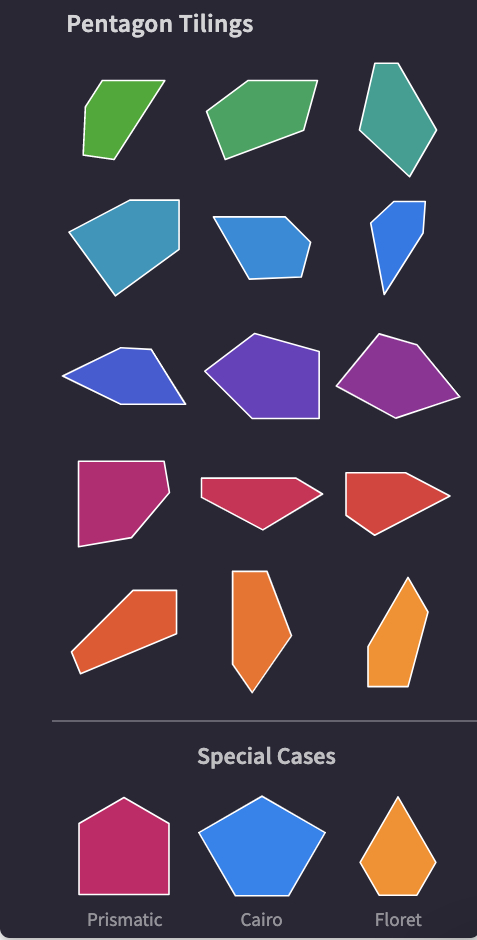
You may use this canvas to show an example of an irregular pentagon tiling.
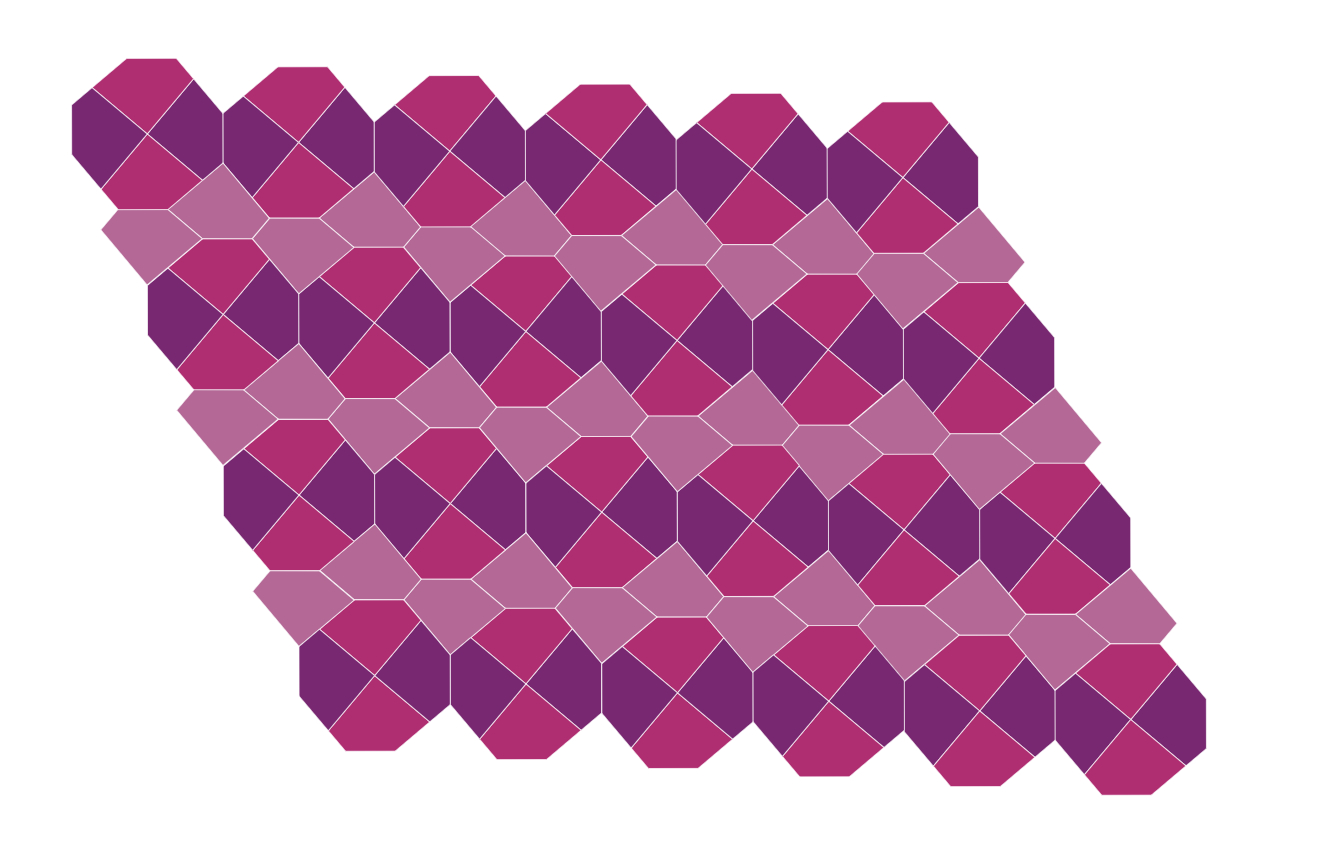
You may ask students to make tessellations using them as another activity. They can measure the interior angles of a pentagon to think of possible configurations.
Activity #7
The artist M. C. Escher is famous for making tessellations with irregular interlocking tiles shaped like animals and other natural objects. You may show some examples from the Tessellation in Art section of the related Mathigon course. Invite students to try to design their own. One approach cab be to start with something that certainly tessellates (e.g., a square, a parallelogram, a triangle). To create Escher-like designs, students can use translation, rotation, or glide reflection.
You may use this canvas to show examples for each.
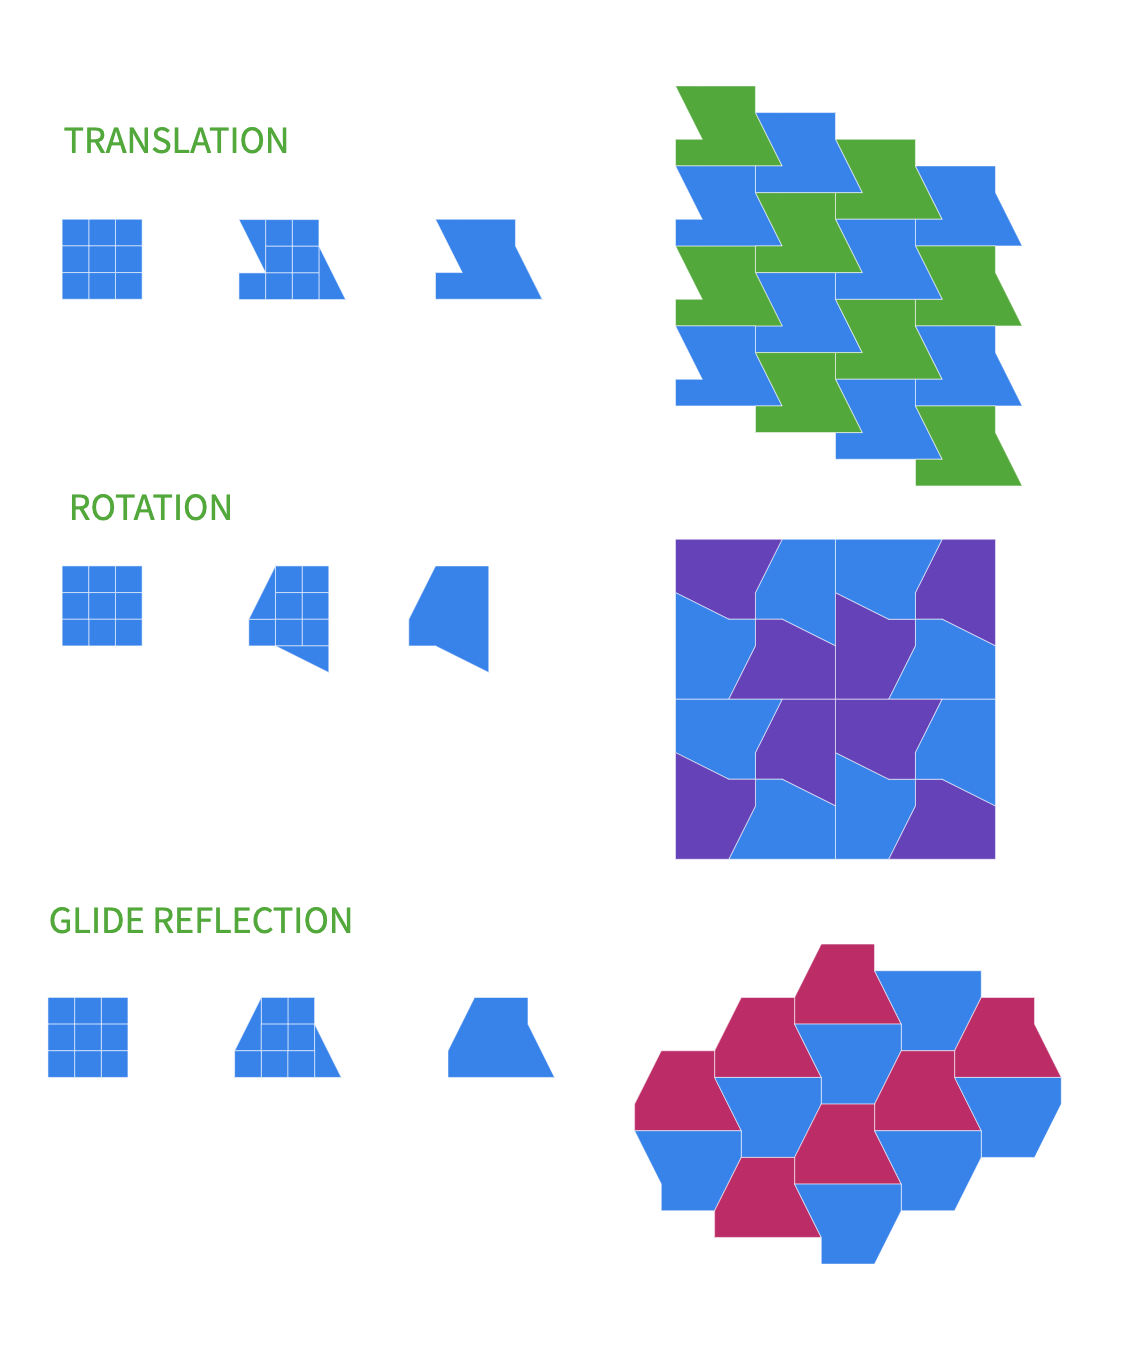
Share some student work with the class. Invite students to share which approaches they found most useful when answering these questions.
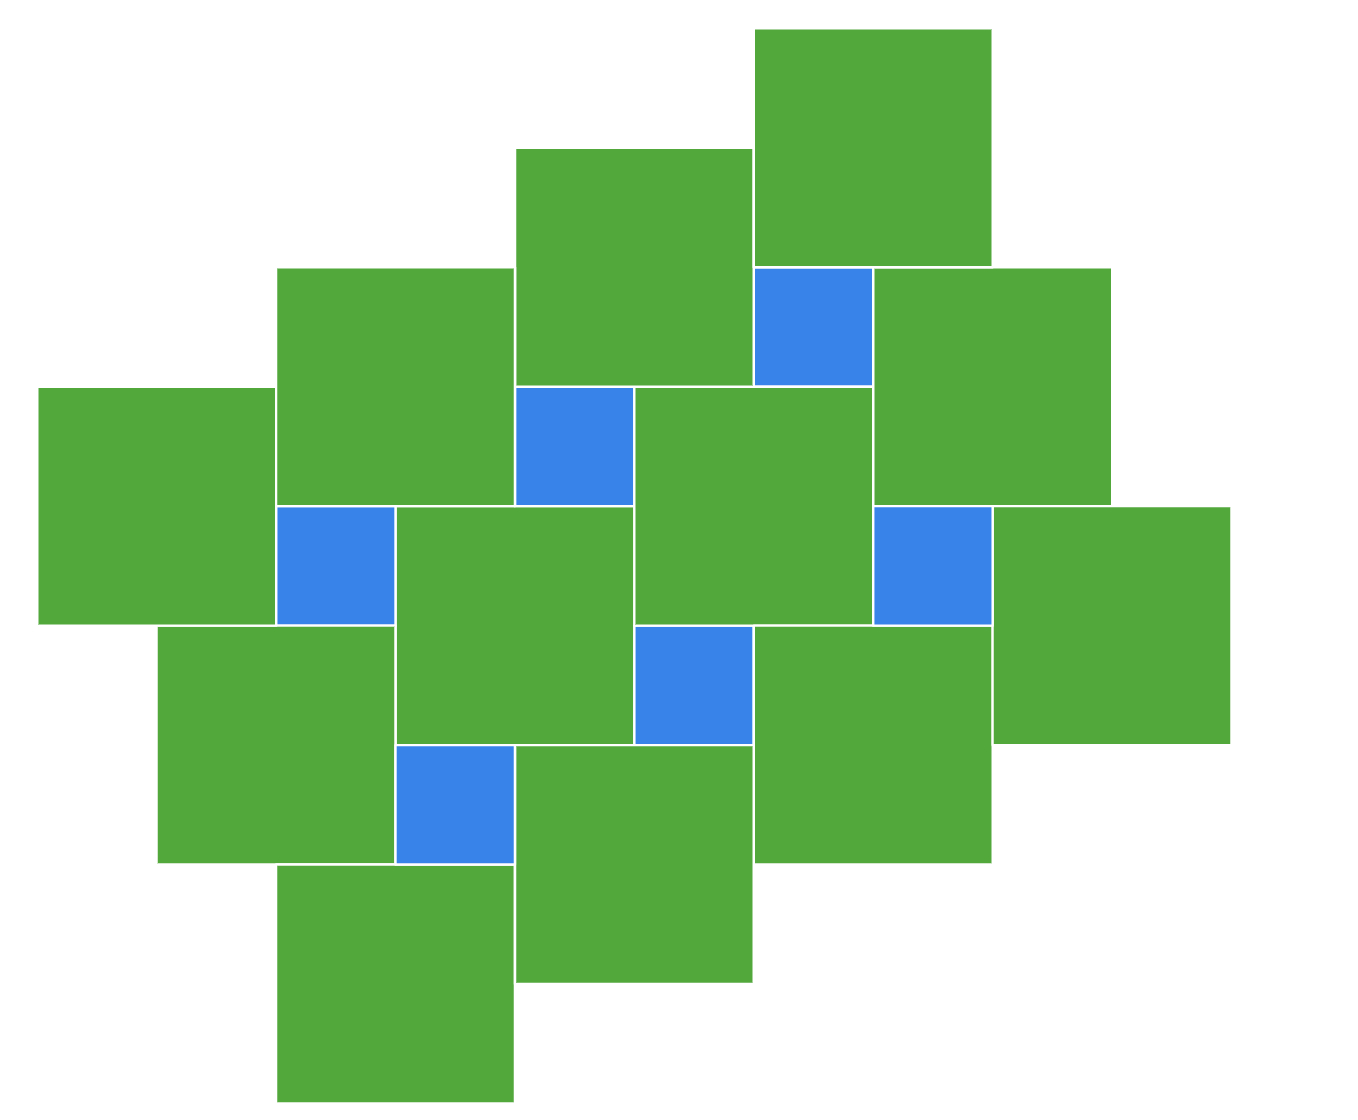
This type of tessellation also has a specific name: Monohedral tiling. In this type, one fills the plane with only congruent figures. The figures do not need to be regular polygons, nor do they need to be edge-to-edge tessellations.
You may show a counterexample for students to grasp the idea better. Although the tessellation below uses one type of regular polygons, they are not congruent polygons, so this is not a Monohedral tessellation.
Activity #8
There are many different types of tessellations that use non-congruent shapes. Some shapes can be used to tile an enlargement of themselves. When several copies of these tiles are put together, the shape will appear exactly the same, but magnified. Every square, rectangle, parallelogram, rhombus, or triangle are examples of rep-tiles.
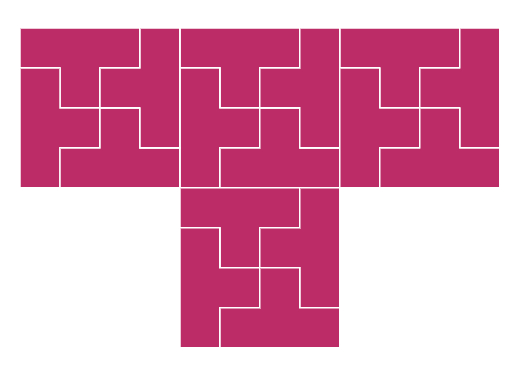
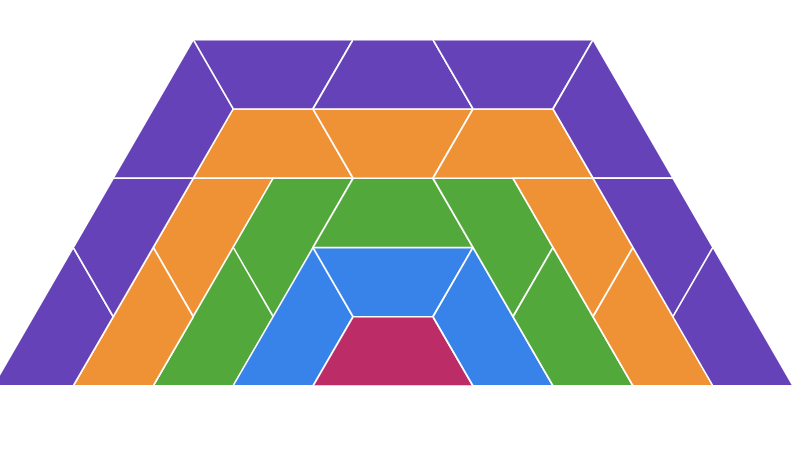
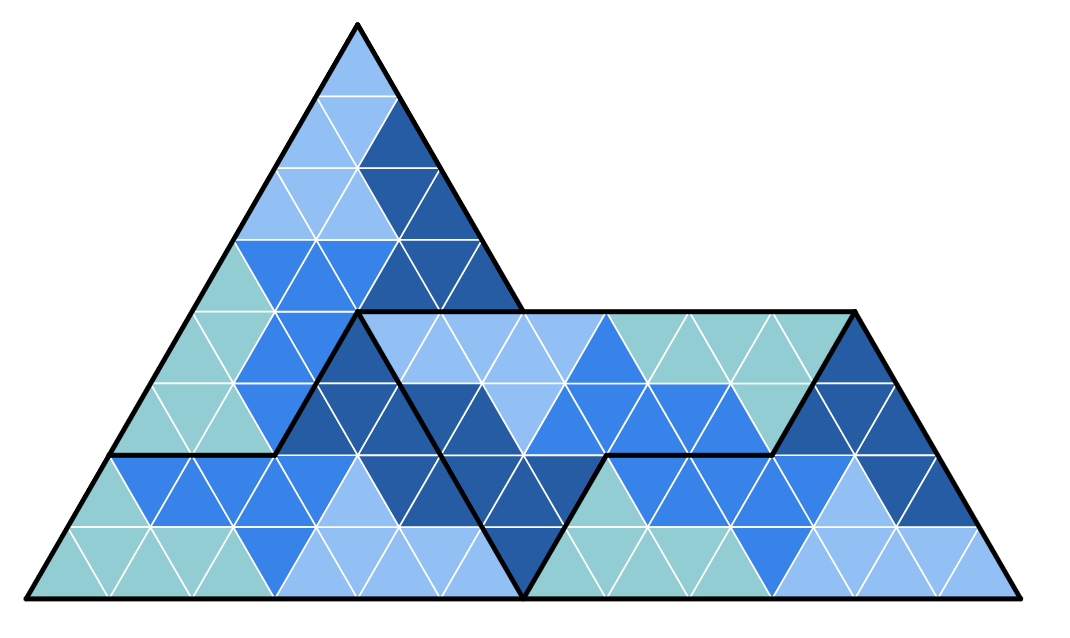
You may use the activities Rep-tiles and Sphinx to explore more about reptile tessellations.
Activity #9
All the tessellations we saw so far have one thing in common: they are periodic. That means they consist of a regular pattern that is repeated again and again. They can continue forever in all directions, and they will look the same everywhere. Like the ones we have been using, tiles with two, three, four, or six axes of symmetry would ultimately result in periodic patterns on an infinite plane.
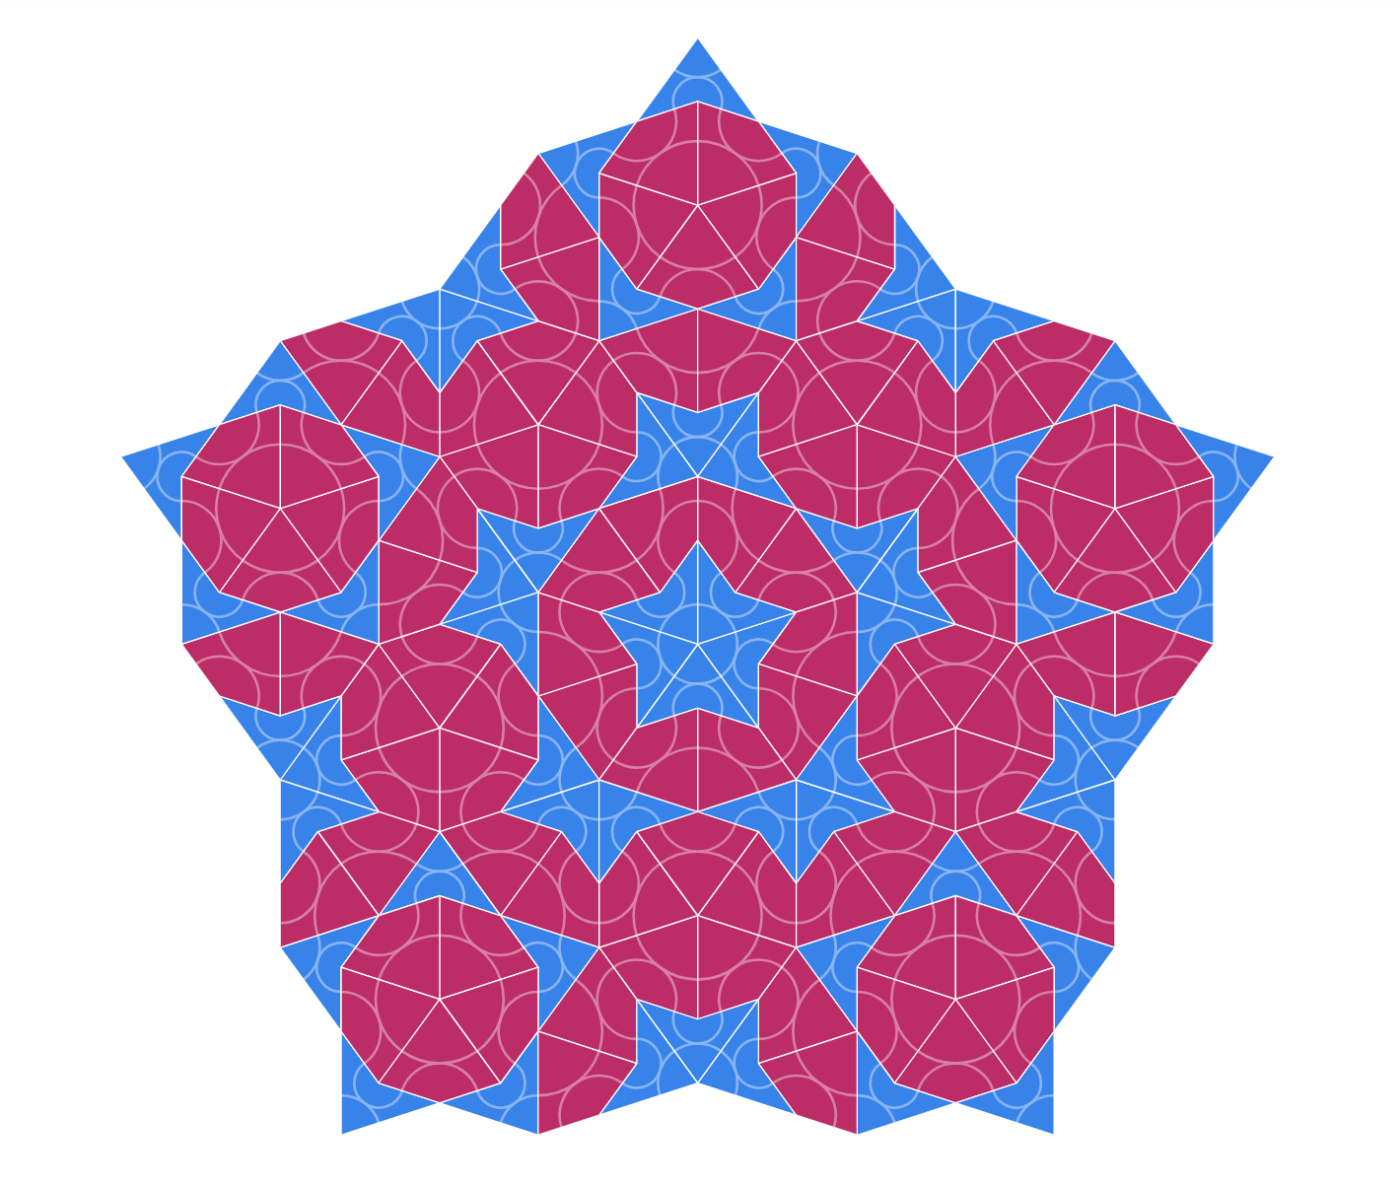
In the 1970s, the British mathematician and physicist Roger Penrose discovered non-periodic tessellations – they still continue infinitely in all directions, but never look exactly the same. To do that, Penrose used the five-axis symmetry of the pentagon. Penrose made different versions of these aperiodic tile sets, the first set is a pentagon, a star, a diamond, and a boat.
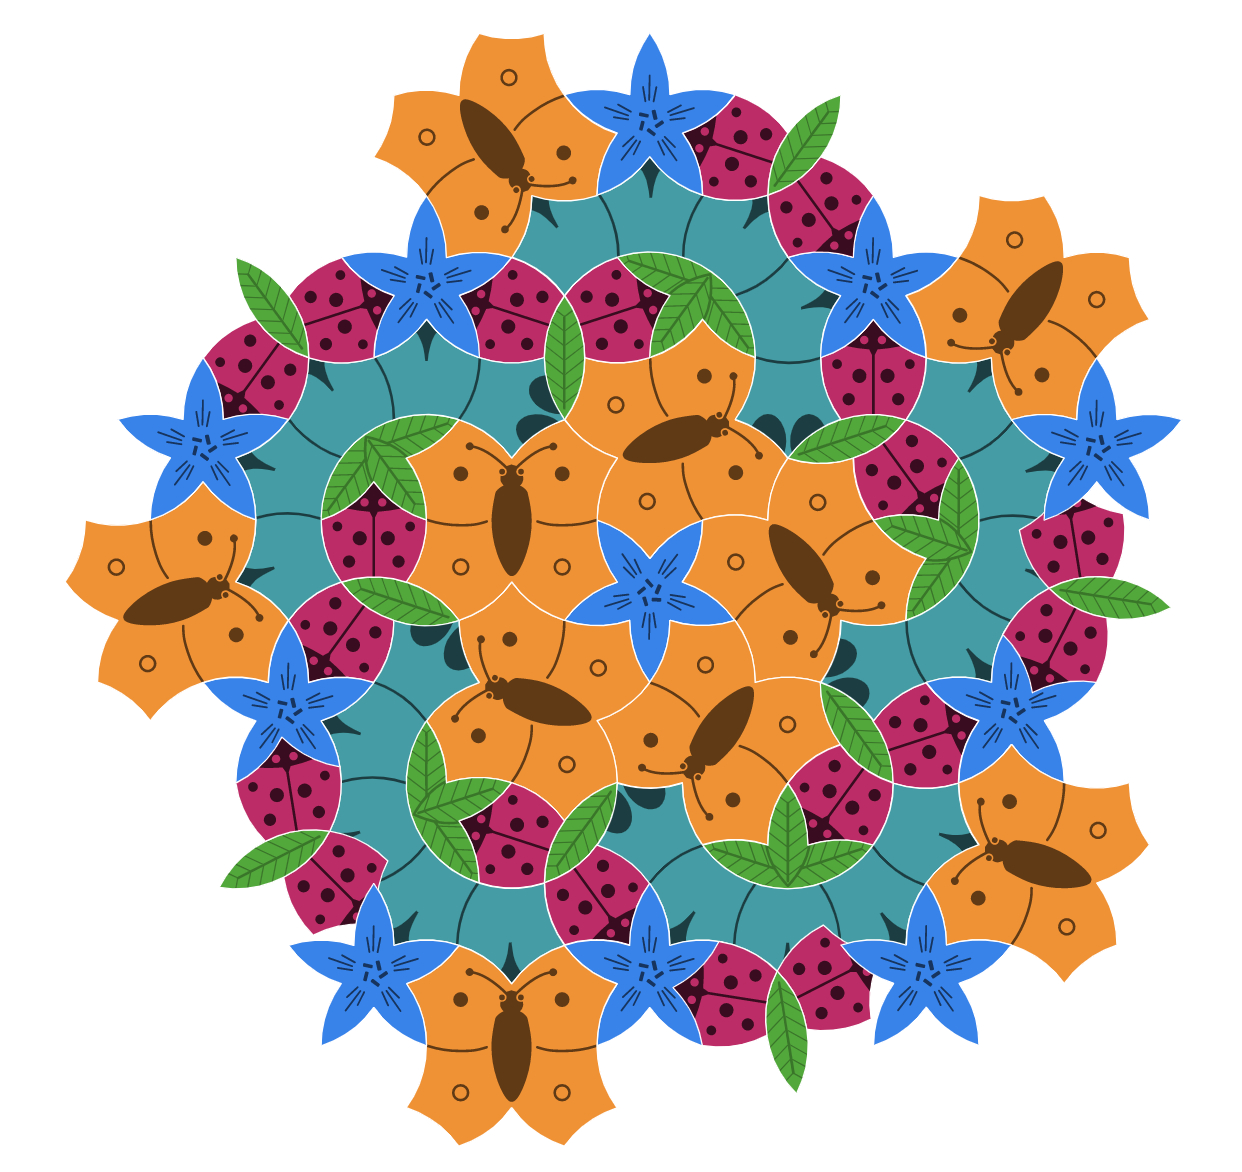
The second set has only two shapes. The dart and the kite with the matching arcs on them. When you make a tessellation using the dart and the kite, arcs on their surfaces have to line up so that they create continuous curves.
Invite students to use the Penrose tiles to create non-periodic tilings. Here are some examples;
Polypads for This Lesson
In this activity, students can use blank canvasses by inserting different tiles. Here are the canvasses linked above that may be helpful for teachers.