Lesson outline
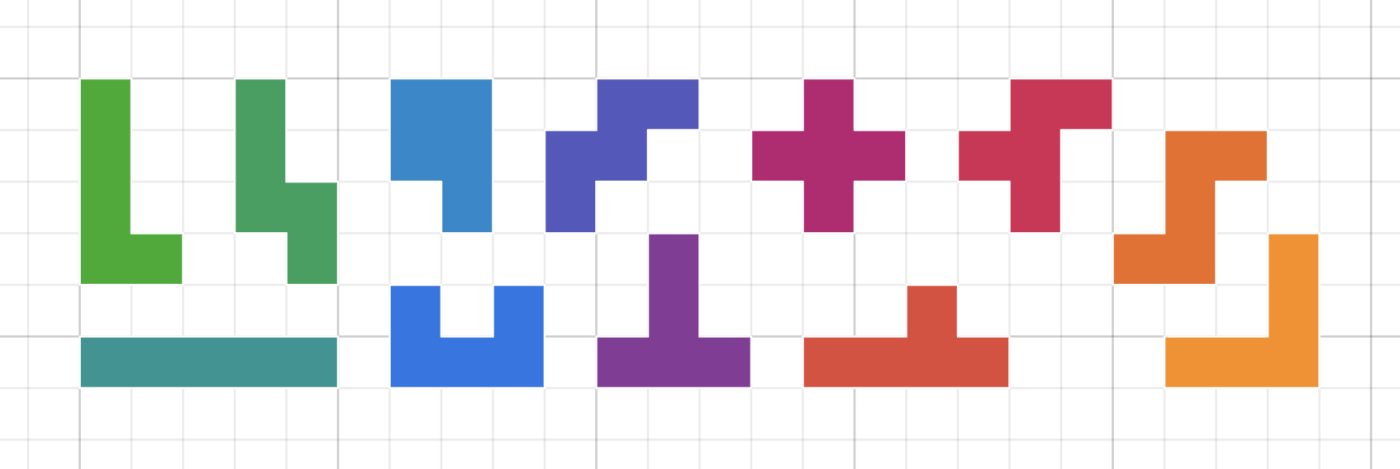
A pentomino is a shape made up of 5 individual squares. There are twelve different types, all of which are available as tiles within Polypad. Pentominoes can be used recreationally to complete various puzzles. This task explores the perimeter of shapes made from pentominoes, and offers students opportunities to work systematically and construct reasoned arguments.
Lesson objective: Understand that shapes with the same area can have different perimeter
Lesson activity
Warm-up
If students haven’t seen pentominoes before, you may wish to start with a quick overview. Use Polypad to display all pentominoes, and enable the square grid to help students see the lengths of each side more clearly.

Invite students to calculate the area and the perimeter of each of the twelve pentominoes, and find the “odd one out”. They should notice that all shapes have the same area (5), but not the same perimeter. Most shapes have a perimeter of 12, except for the P-pentomino which has a perimeter of 10. Can students explain what’s different about this pentomino?
Main Activity
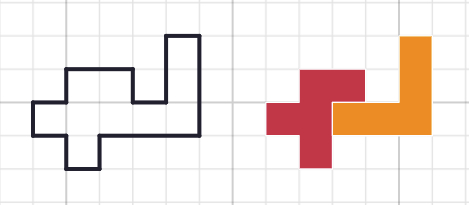
Now introduce the idea of joining two or more pentominoes together. Explain that we want to stay within the squares of the grid and match up the squares of pentominoes as we join them. You may wish to show them an example, such as this one. Remind students that the two pentominoes are not allowed to overlap.

Invite students to make some shapes of their own by joining together two different pentominoes (but they can use the same pentomino more than once in different pairs). For each shape, can they work out its perimeter?
Consider sharing this Polypad with students as a starting point.
If students are struggling (for example, counting the “joins” as part of the perimeter), they could use the ruler tool to trace around the pentominoes, and then delete the tiles underneath so that only the outline remains.

Once students have created a few examples, pose the following questions:
- What is the smallest perimeter of a shape made by joining two pentominoes together?
- What is the largest perimeter of a shape made by joining two pentominoes together?
- Which perimeters in between can you make?
- Can you make a perimeter of 15?
- What are the areas of your shapes?
Give students some time to explore, reminding them of the importance of recording their findings so that they are ready to share with the class later. If students have their own devices, they can use the pen tool to annotate the shapes they make or the text tool to record the perimeters and areas.
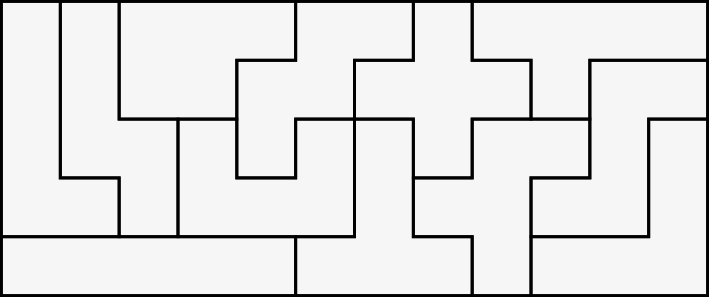
It might be useful to keep the 12 pentominoes visible on the board or print a copy of the pentominoes so that students working on squared paper can remind themselves of the shapes they are working with. At the end of this document is a diagram of all pentominoes with a side-length of 1 cm.
Towards the end of the lesson, bring the class together to share findings. You could encourage students to share some of the shapes they found with the whole class and explain their reasoning. If students are working on Polypad, you can share their work via the "Class" tab on Polypad. Here are some useful prompts for drawing the discussion together:
- How do you know that you have found the smallest/largest possible perimeter?
- How did you work out the perimeters?
- What were the areas of your shapes?
- Why are all the perimeters even numbers?
- How can you be certain that no other perimeters could be made?
Finish off the lesson by emphasising that when we join two shapes together the area of the new shape is the sum of the original areas, but the perimeter of the new shape depends on how much of the original shapes’ perimeters are touching.
Possible solutions
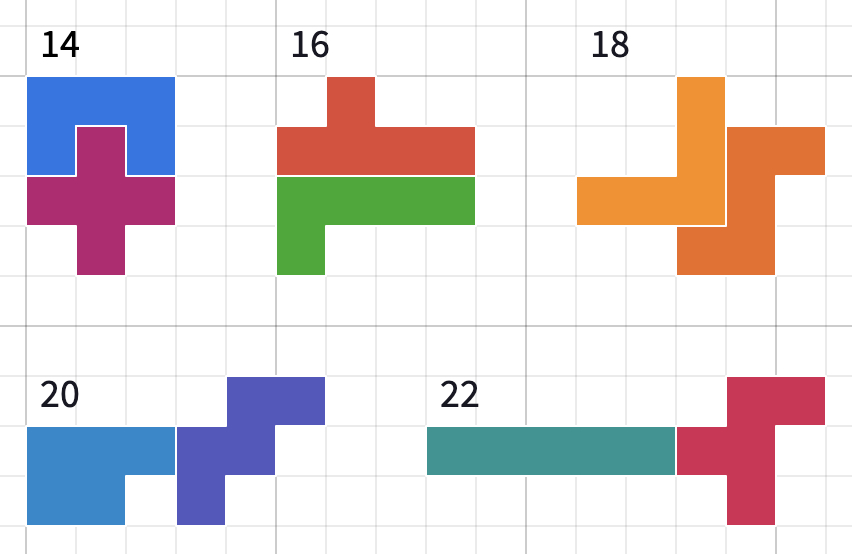
Here are some of the shapes students might have found for each of the possible perimeters, from the smallest possible (14) to the largest possible (22).
22 is the largest possible, because every pentomino has a perimeter of either 10 or 12, and the maximum perimeter is made by joining together two pentominoes with a perimeter of 12 so that they only touch by one unit.

14 is the smallest possible perimeter, and there are three different ways to make this (excluding rotations and reflections):

As every pentomino has an area of 5 square units, two pentominoes form a shape with area 10 square units.
As every pentomino has an even perimeter, and joining pentominoes reduces their combined perimeter by twice the length of the overlap, every combination of pentominoes will also have an even perimeter.
Support and extension
The same activity can be adapted to use the tetrominoes rather than pentominoes, which may help students who are overwhelmed by thinking about twelve different pieces at once.
An important part of this activity is that pentominoes are not allowed to overlap. At some point, you could show the class an example with a perimeter smaller than 14, and that you’ve “beaten” everyone to the smallest perimeter. See if students notice that you overlapped the pieces and discuss how the class feels about that – should it be “allowed” or not?

As an extension, students could explore what happens when you join together more than two pentominoes, perhaps working up to the question “What is the maximum perimeter of a shape made from all twelve pentominoes?”
